Hard Spots are localized areas in the plate surface where the hardness exceeds the designated value.
Hard Spots occur on the plate surface being caused by negative variations in the processes of plates manufacture.
Being invisible to the conventional UT or X-ray techniques, Hard Spots may result in microcracks in the pipe production process. Those microcracks, developing in the pipelines, destroy them, resulting in incidents or even explosions.
Since there have been several pipeline incidents related to hard spots in recent years, the issue has drawn a lot of attention and new regulations for plates/pipes producers have appeared.
It is well known that even the conventional EC-sensors can be sensitive to Hard Spots. However, the conventional EC-technique is also extremely sensitive to variations of lift-off, rolling scale on the plate, residual magnetization, etc. – the multiple industrial factors substantially reducing the efficiency of the conventional EC-technique or even making its application impossible.
NORDINKRAFT has developed and patented a unique method and respective hard-and-software allowing an extremely reliable automatic examination of plates for hard spots in severe industrial environment.
This method is based on a very sophisticated multifrequency analysis of signals, provided by so called “PEC probes”, specially designed by Nordinkraft for the above application.
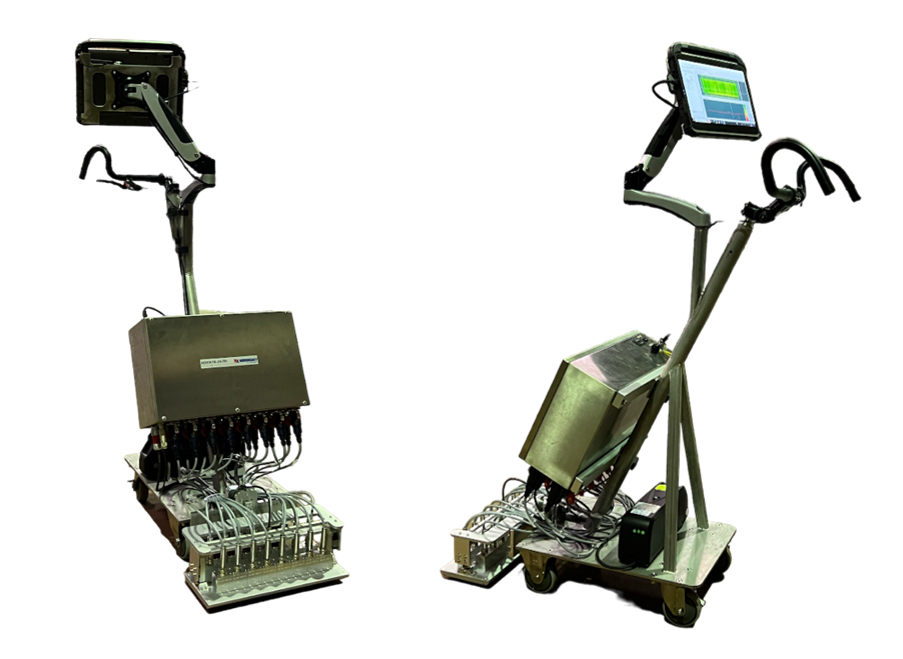
The new RIDER-HS, a push-cart controlled by operator, can detect hard spots of 10mm x 10mm and bigger in steel plates, with almost no untested zones on plate edges.

Main advantages of RIDER-HS:
- Modern and sophisticated concept.
- No or negligible influence of the residual magnetization from magnetic cranes. Not necessary to demagnetize the plate prior to the test.
- Robust and individually adjustable mechanics.
- Special system allows very convenient testing of edges.
- Sensitive and smart PEC probes, reliable electronics, modern software, high autonomy.
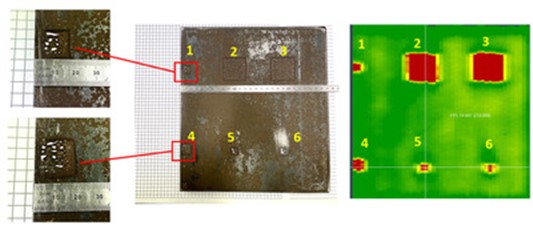
- High test sensitivity – detection of hard spots of min 10mm x 10mm.
- Test speed is monitored. When operator exceeds the pre-set maximal speed, a special alarm will be activated.
- C-scan allows observing the images of the hard spots found, and evaluating their hardness, dimensions, shapes, and positions.
- High test capacity: Rider tests the path of about 360 mm in one run.
- Small or even no untested zones at edges.
- PC-based, advanced representation of test results.
- User-friendly, interactive interface.
- Automatic measuring/evaluation of parameters of defective areas.
- Tested area monitoring.
- Wi-Fi communication with the workshop PC.
